

5 Minute HelpDesk – How to create Virtual Desktops in Windows 11
Are you a fan of virtual desktops? If not, you soon will be. Windows 11 comes with an improved virtual desktop feature that makes it easier and more convenient to use multiple desktops. In this blog post from our IT helpdesk, we’ll show you how to take advantage of this new feature and make your workday a little bit easier. Stay productive with Windows 11 and virtual desktops!
What are virtual desktops and why would you want to use them on Windows 11
The new virtual desktop feature in Windows 11 allows users to create multiple desktop environments, each with its own applications and windows. Virtual desktops are particularly useful for users who need to juggle multiple tasks simultaneously, as they can help to keep unrelated applications and windows organized. In Windows 10 or some of the other older versions, you can create virtual desktops only if your PC has multiple displays.
How to create a new virtual desktop in Windows 11
Creating virtual desktops in Windows 11 is very easy. Follow the below steps to get started.
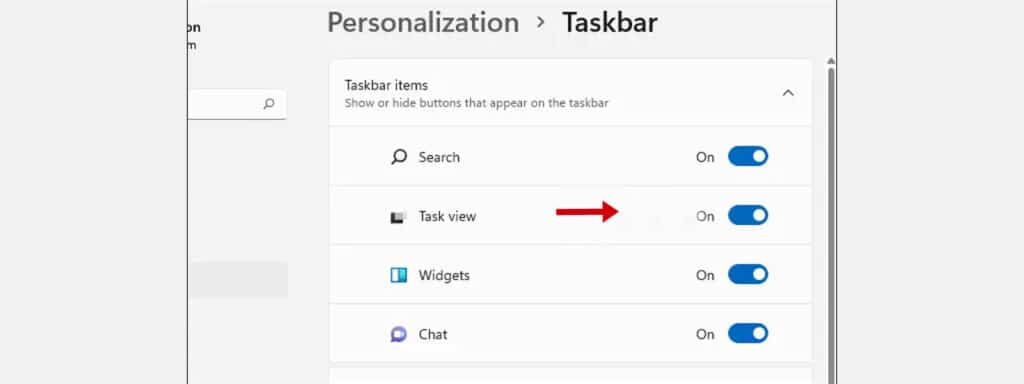
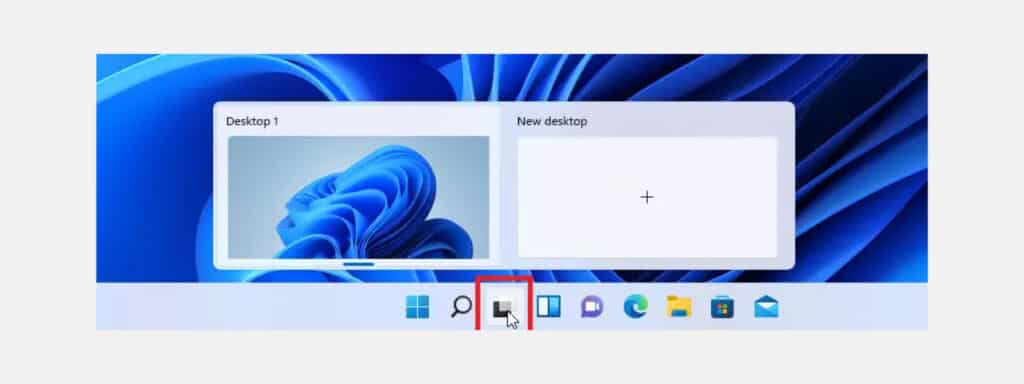
Step 1. Click on the Task View in the taskbar. Can’t see Task View? Right-click on the taskbar > Taskbar settings > Task View and change the option to ON.
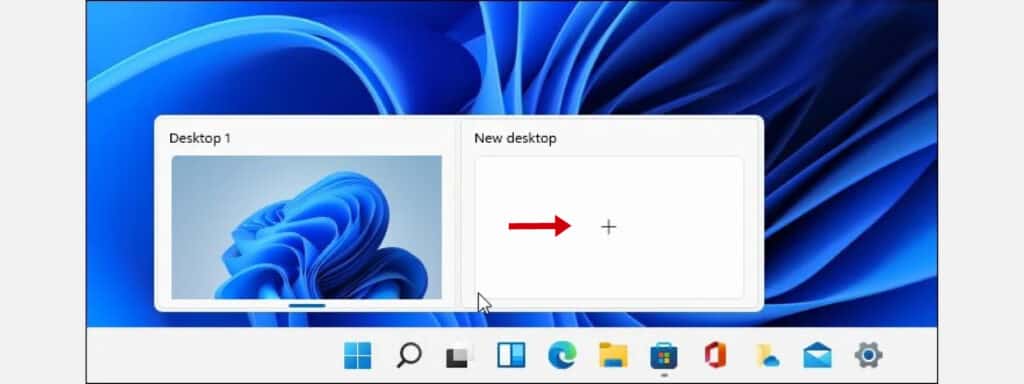
Step 2. On opening the Task View, you will see virtual desktop thumbnails displayed in a row at the bottom of the screen.
Step 3. You will see a thumbnail with a ‘+’ sign named New Desktop. Click on New Desktop. A new desktop will appear in the thumbnail row.
Step 4. Click on the newly created desktop thumbnail. This will open the new virtual desktop and you can work just as you would on the primary desktop. Any apps that you open will display in the taskbar just like the original desktop.
How to switch between virtual desktops in Windows 11
To switch between virtual desktops, open Task View and click on the thumbnail of the desktop that you want to use. The arrangement of apps in each virtual desktop gets saved and opens up when you use the particular desktop.
Don’t need the virtual desktop any longer? Delete it with these easy steps.
Step 1. Open Task View from the taskbar.
Step 2. Hover over the thumbnails. You will see an ‘X’ mark on the top right of the thumbnail.

Step 3. Click on the ‘X’ of the virtual desktop that you don’t need.
Please note that any open app in the deleted desktop will move to the left open desktop. For example, any open apps from deleted Desktop 3 will move to Desktop 2. Close all the apps on a virtual desktop before deleting it to save the arrangements on the existing desktop.
Tips and tricks for using virtual desktops on Windows 11
1. Set different backgrounds for each virtual desktop. This makes it easy to switch between them.
2. You can name your new desktop by clicking the “Name” button at the top of the screen. Renaming the desktops by Projects is a popular method.
3. You can have a window open across multiple desktops. Right-click on the app and select ‘Show this window on all desktops’ from the options.
4. Use keyboard shortcuts for quick navigation between virtual desktops. Here are some of the keyboard shortcuts that will be useful.
- To open task view – Win + Tab
- To create new desktop – Win + Ctrl + D
- To switch between desktops – Win + Ctrl + Left/Right arrow
- To rearrange desktops – Alt + Shift + Left/Right arrow
- To delete a desktop when Task View is open – Press Delete on the selected desktop
With the release of Windows 11 and its improved virtual desktop feature, using multiple desktops is easier and more convenient than ever before. Stay productive with virtual desktops in Windows 11! If you want to learn more or need help setting up this new feature, get in touch with our IT helpdesk today. We would be happy to walk you through the process and answer any questions you may have
Jargon Buster
Taskbar: In Windows, the bar at the bottom of the screen, that shows open and favourite apps.
Window: A window (separate from Microsoft Windows) is a viewing area on a computer display screen.
Microsoft Windows : An operating system developed and published by Microsoft.

